Nuget User Guide
How to configure your Nuget Source in Visual Studio
Recommendation
IMPORTANT: As of June 5th 2020, our (ESDC’s) internal NuGet source (through JFrog Artifactory) has been removed.
Packages can be stored and shared through other NuGet sources like:
- nuget.org
- Azure DevOps Artifacts (self managed sources)
URL for NuGet Source
How to add the alternate Sources to Visual Studio
- Open Visual Studio
- From the menu “Tools\Library Package Manager” select “Package Manager Settings”
- From the “Options” window, select “Package Manager\Package Sources”
- Click the “+” button
- Enter a name for the source to be added (ex: GoCSource)
- Enter the url of the alternate source
- Click “OK”
How to view and install available packages
- Open a project in Visual Studios
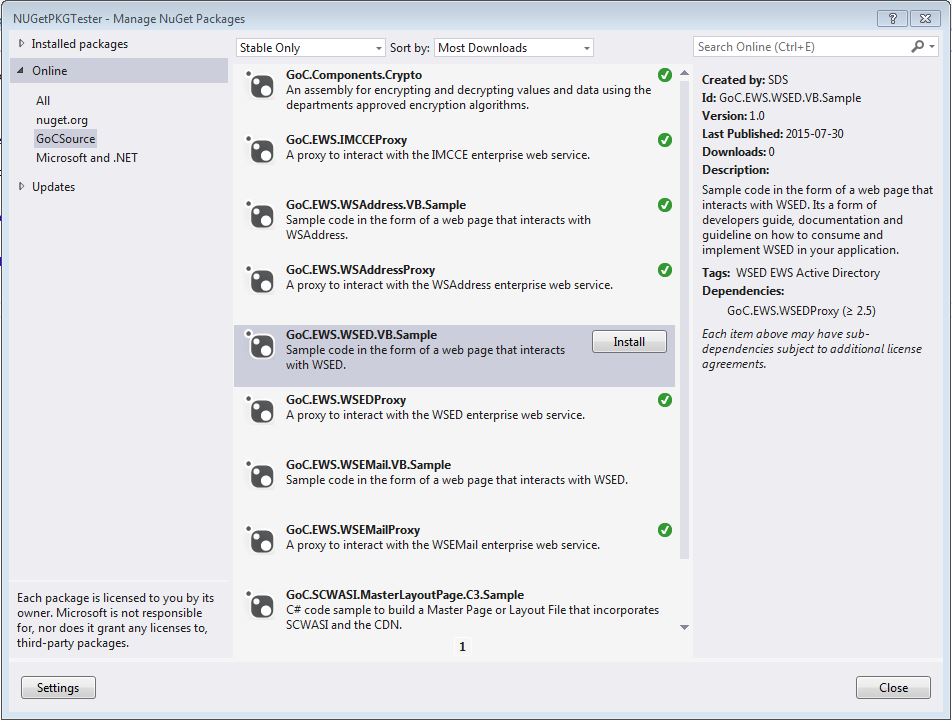
- Right-click on the Project, and select “Manage NuGet Packages…”
- Select the internal source you added in the previous steps
- The list of available packages should be displayed in the center column and the description of the selected package will appear in the right column.
- Click the “Install” button to install this package into your project.
- What will this do?
- Add a “packages” folder at the top level of your projects folder
- This “packages” folder holds the files required by the package
- If dlls were included in the package, the reference to the dlls were added to your project
- If config changes included in the package, your config file will be modified to include to entries
- If the package has dependencies to other packages, those packages will also be installed
